
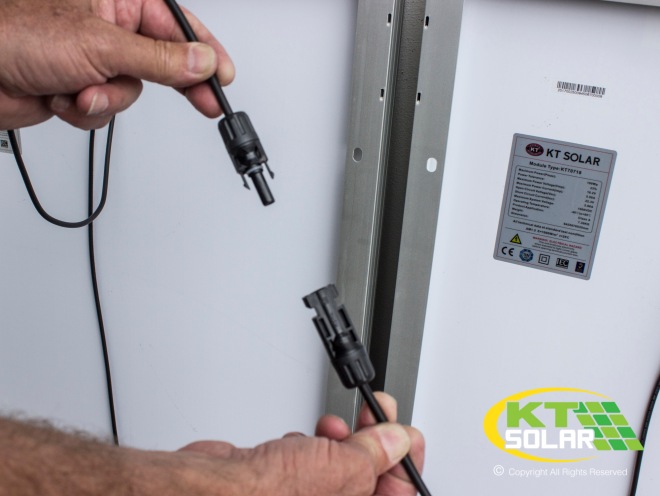
KT Solar MC4 Connectors are available in Male and Female Connections and are commonly used on the leads running from Solar Panels, to connect other solar panels in ‘Parallel’ or in ‘Series’.
Definitions of Solar ‘Series and Parallel Connections’
There are two main ways in which you can connect multiple panels for higher power output. These wiring configurations are known as Parallel & Series.
Parallel wiring configuration doubles the Wattage and Amperage but keeps the voltage nominal at 12V. It is very advantageous in Auto/Marine applications particularly to use multiple panels. Parallel Is the most commonly used wiring configuration because when you put two panels together you double the amps when you put 3, you triple and on a large caravan motor home you can place 4 Solar panels and quadruple your amperage but maintain the voltage. This is an exceptionally very good way to keep voltage nominal and increase amperage.
When wiring two panels in series, the Voltage and Wattage Double. (When using two panels of the same Voltage) and Amperage rating remains unchanged.
Connecting Multiple Solar Panels in Parallel refers to 2 or more Solar Panels of the same Wattage being connected Positive to Positive, Negative to Negative.
Simply put, Parallel is the same as when you are trying to jump-start a car – positive to positive, negative to negative. That is a parallel connection. The nominal voltage remains at 12V.
Connecting Solar Panels in Series refers to 2 Solar Panels of the same Wattage being connected Negative to Positive, Negative to Positive.
A great way to think about Series is the common household torch. The torch has up to 6 x 1.5V batteries all sitting on top of each other but it’s connected negative to positive, negative to positive all the way through then you end up with a load at 9V. (6 x 1.5V = 9V). This is an example of a series connection.
KT Solar MC4 Connectors are available in 3 packs.
Model No. KT70773
1 x Male MC4 Connector + Terminals Single Retail Pack
Model No. KT70772
1 x Female MC4 Connector +Terminals Single Retail Pack
Model No. KT70774
1 x Male & 1 x Female MC4 Connector + Terminals Twin Retail Pack


Left Image (KT70772 – Female MC4 Connector)
Right Image (KT70773 – Male MC4 Connector)

What will I require to install MC4 Connectors?
You will require the following to proceed with your installation:
- 1 x Cable Cutter (We Recommend KT Model No. KT32034)
- 1 x Terminal Crimper (We Recommend KT Model No.KT32052
- Solar cable in UV Stabilised 4.0mm2 similar to that provided on the panels, however B&S in red/black is also suitable for lengths of cable and runs.
- 1 x MC4 Connector Twin Pack (We Recommend KT Model No. KT70774 Twin Pack of Male and Female MC4 Connectors) – Or however many MC4 Connectors required in your connection.
How to Correctly install MC4 Connectors?
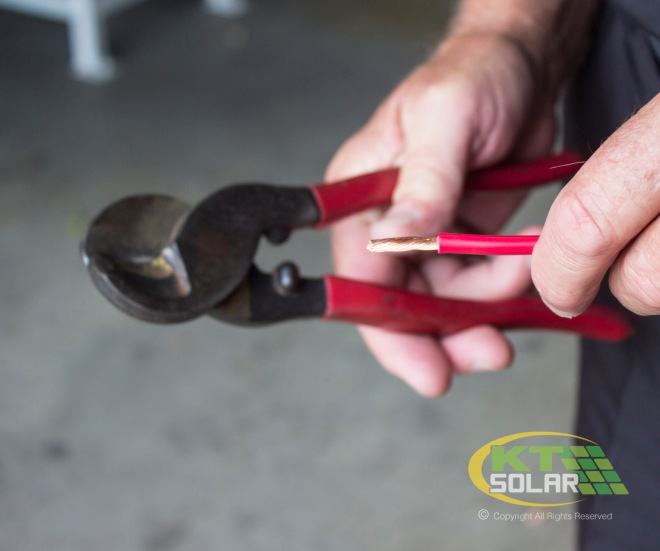
Step 1.
Cutting your Cable Length to Size
Trim your B&S cable length to size, or neatly trim the end off your Solar Panels Fly Leads using a set of Cable Cutters or wire strippers.
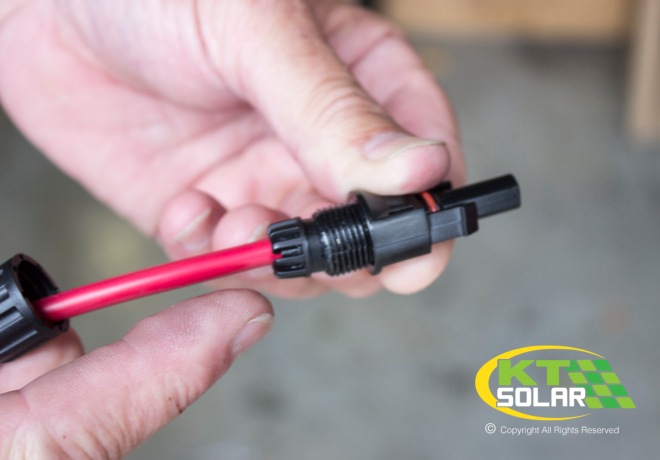
Step 2.
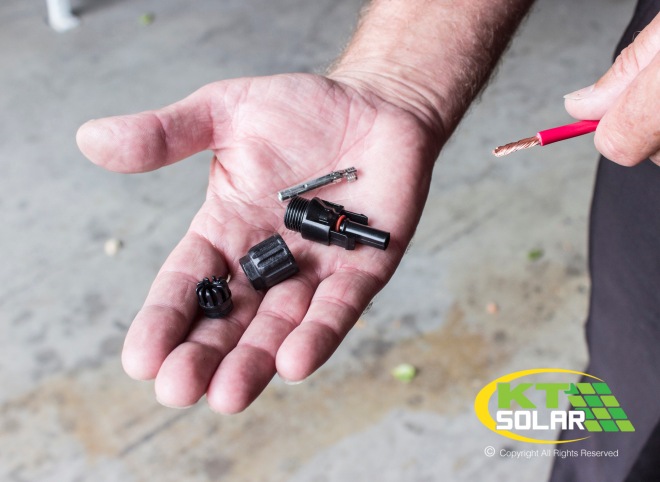
Undo the ‘Screw Cap’ of your first MC4 Connector
MC4 Connectors use 4 components to make a complete MC4 Connector.
Step 3.
Feed the Screw Cap onto the Cable End
(as per Example Below)
Ensure to feed your screw cap on the correct way, as you will need to remove this if you have it the wrong way around.

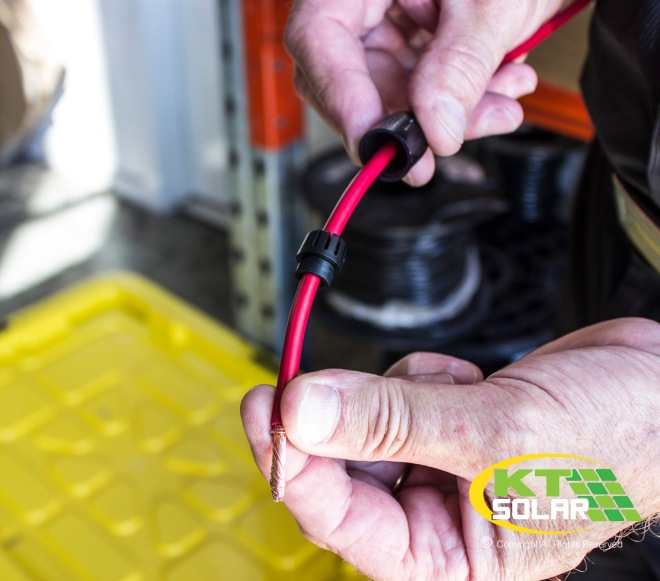
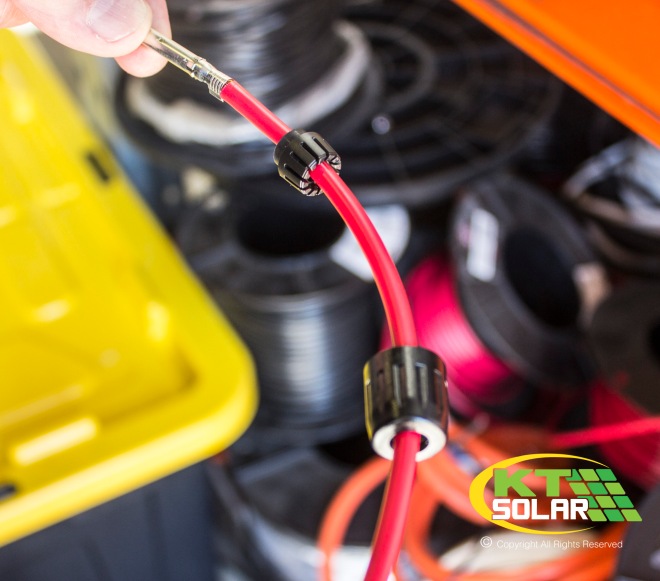
Step 4.
Feed the Cable Gland onto the Cable
Ensure to feed your screw cap on the correct way, as you will need to remove this if you have it the wrong way around.
Step 5.
Feed the MC4 Terminal / Pin onto the Copper Stripped end of the cable. Use a Crimper to crimp and secure the contacts of the terminal.
By Crimping the terminal onto the cable, you are securing the copper cable to the contact for a secure power connection.
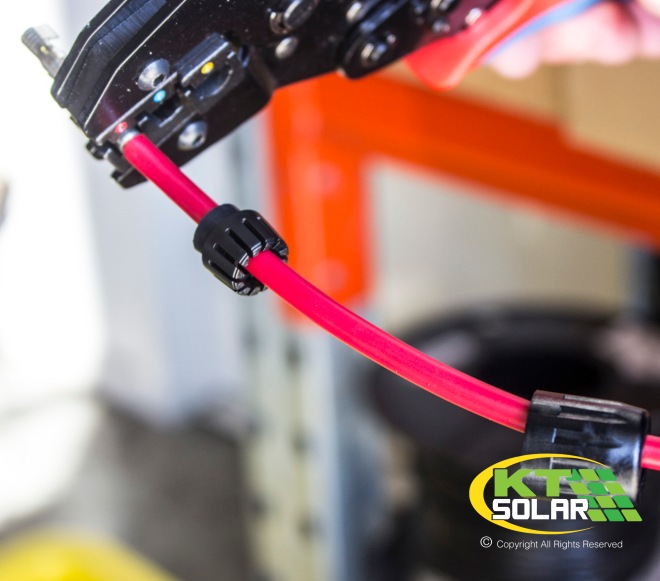
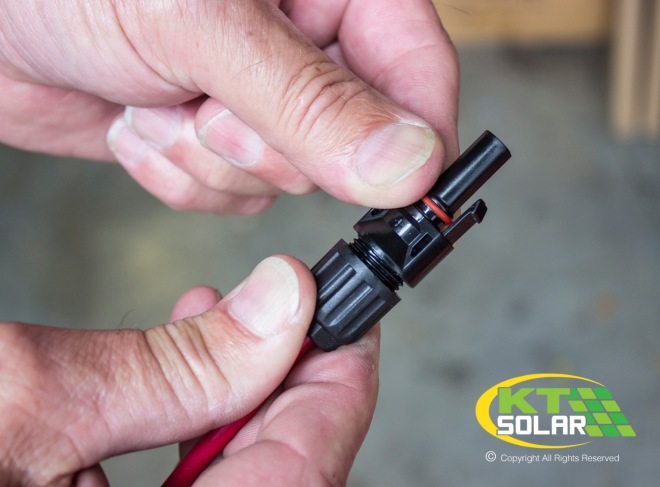
Step 6.
Feed the Main ‘Male’ Component of your MC4 Connector onto the cable as displayed in image below.
The Screw components should meet in the middle, allowing you to screw and tighten the MC4 Connector. Always ensure the MC4 Connector components are pushed to the end of the cable before attempting to secure the connector together.
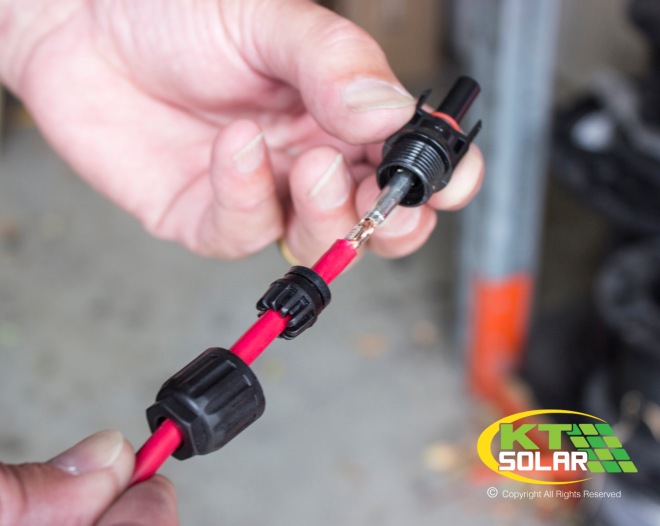
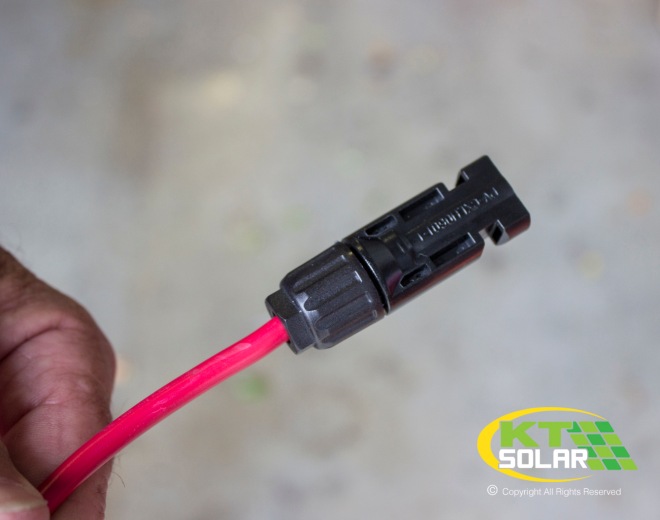
Step 7.
Push the Initial Screw Cap down the cable to meet the MC4 Connector, and tighten to form your secure connection.
After completing this install correctly, you should be able to gently ‘pull’ at the MC4 Connector and it should feel secured onto the end of the cable.
To install a ‘Female MC4 Connector’, repeat this process, with the KT Model No. KT70772 – KT Solar Female MC4 Connector.
Should you have any questions about KT Solar MC4 Connectors and ‘How to Install’ or require any further information, please contact our friendly sales team on 1300 559 953 or submit any inquiries through the below contact form.
